Are you seeking a simple way to add post thumbnails to your WordPress RSS feeds?
There is no denying that RSS feeds assist you to promote your content in feed readers and other applications that utilize RSS feeds. Unluckily, RSS feeds will not include your blog posts’ featured images.
Hence, in this article, we provide you with a quick guide to help you add post thumbnails to your WordPress RSS feeds.
Why should you add post thumbnails to your WordPress RSS feeds?
As you know, RSS stands for Really Simple Syndication helps your readers quickly update the latest content as well as easily look for information they want without visiting your website manually. You can take advantage of the RSS feed to promote your content and drive traffic to your blog effectively.
Nevertheless, there is a disadvantage that WordPress RSS feeds don’t display your blog posts’ featured images. Whereas adding post thumbnails to your WordPress RSS feeds can help improve the feeds and offer a great user experience.
For that reason, in today’s blog, we are going to give you a step-by-step guide to help you add post thumbnails to your WordPress RSS feeds without effort. Now, let’s dive into our blog.
How to add post thumbnails to your WordPress RSS feeds?
Method 1: Using a free plugin
The first method that we would like to recommend is using the Featured images in RSS for Mailchimp & More for your website. This is a free plugin with over 30.000 active installations. It assists you to add images to your RSS feed. Thanks to that, featured images will be shown in your RSS email campaigns, ActiveCampaign, Hubspot, Zoho, and other services that utilize RSS feed data.
Now, to use this tool, first of all, you need to install and activate it.
The process of installing a plugin in WordPress is pretty simple. You can follow our simple guide:
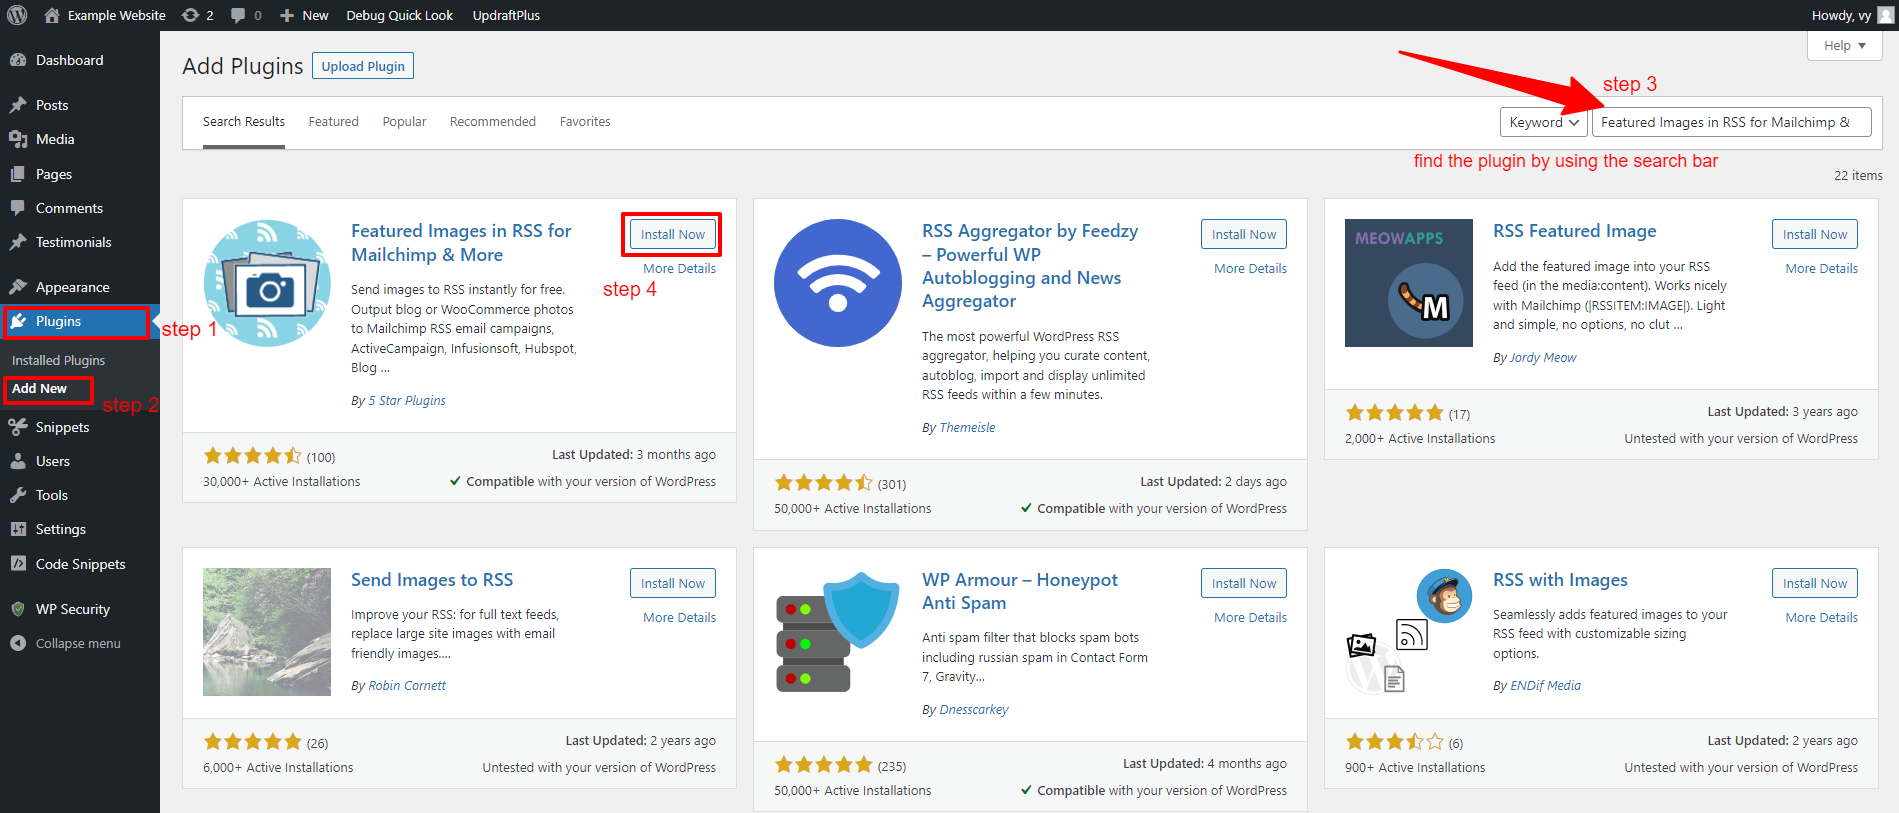
- Log into your WordPress dashboard
- Go to Plugins > Add New options
- Use the Search bar to find the plugin
- Click on the Install Now button and Activate it
Once the plugin is activated. Now, negative to Featured Images in RSS menu from your WordPress dashboard to configure the plugin’s settings.
From there, you are able to change the RSS image size by choosing available options from the drop-down menu.
In addition, this plugin allows you to modify the RSS image alignment, and text padding, simply check the box next to the “Clickable image” option if you want to make the image clickable.
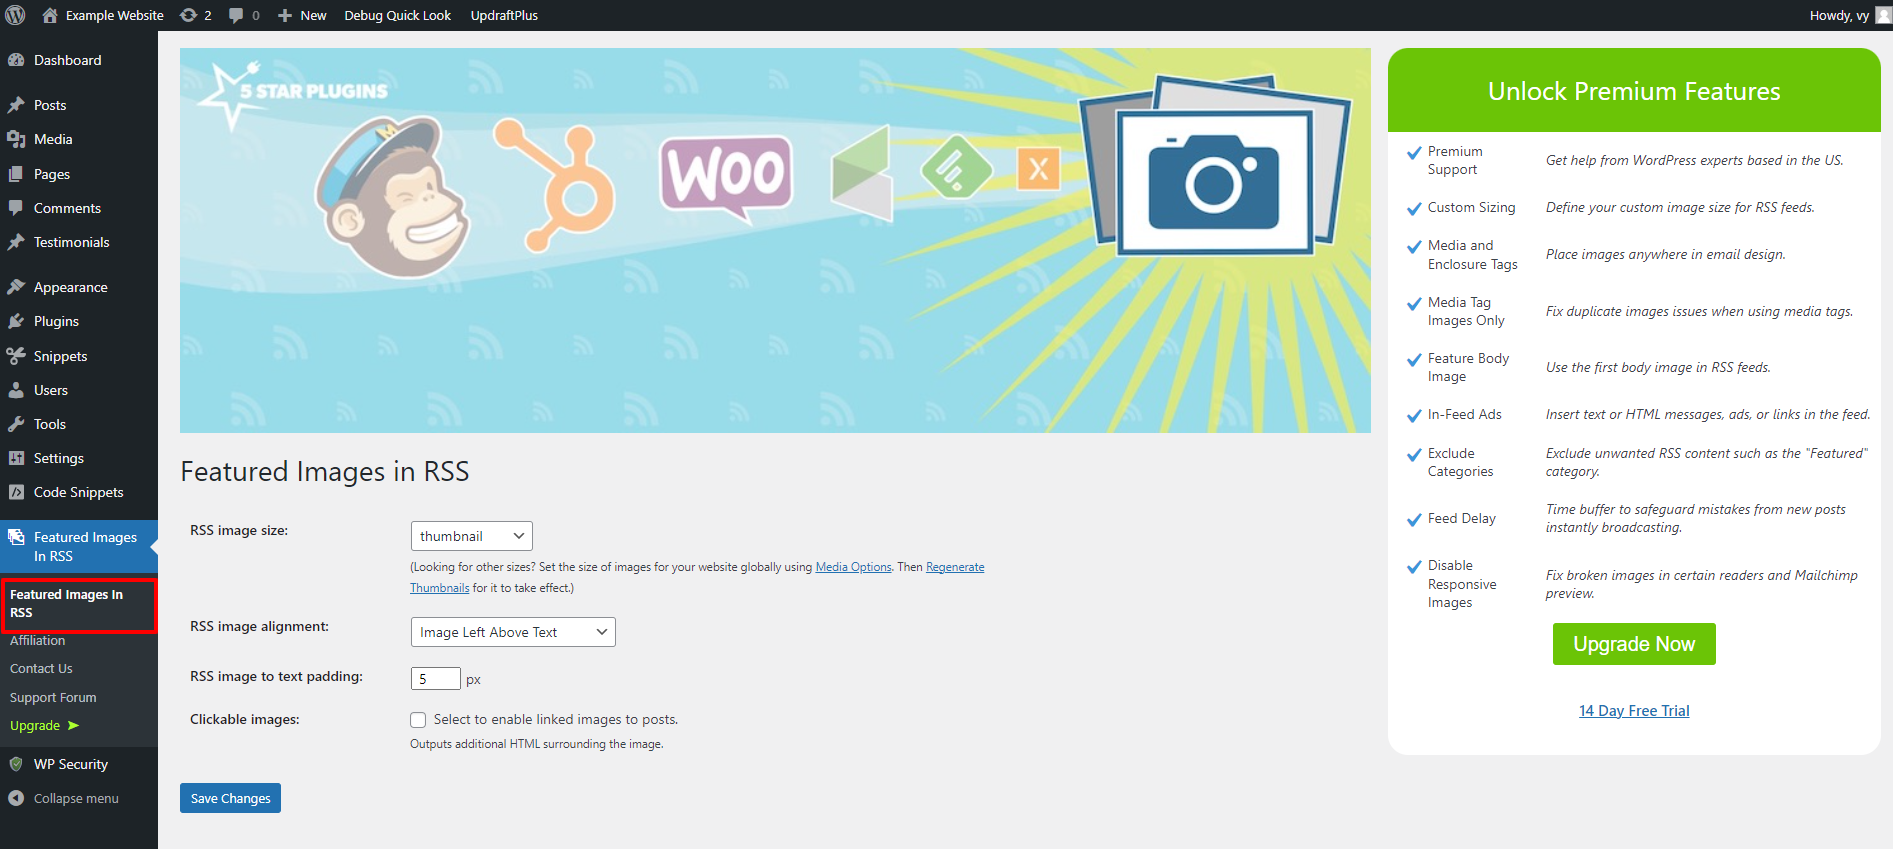
Once you are done, don’t forget to click on the “Save Changes” button to finalize the process of adding post thumbnails to your WordPress RSS feeds.
Method 2: Using custom code
Instead of using an additional plugin, you can still add post thumbnails to your WordPress RSS feeds by adding a code snippet to your theme’s function.php file.
However, if you are a beginner, we highly advise that you should not make changes to your functions.php file because any changes to your functions.php file can also cause mistakes by chance, which can break your WordPress site.
Another way that can help you handle this issue is by using the WPCode plugin. This plugin will help you easily add code snippets to your WordPress site without having to edit your theme’s functions.php file.
Similarly, you first install and activate the WPCode plugin before using it. All steps to install this plugin is the same as what we did to the above plugin.
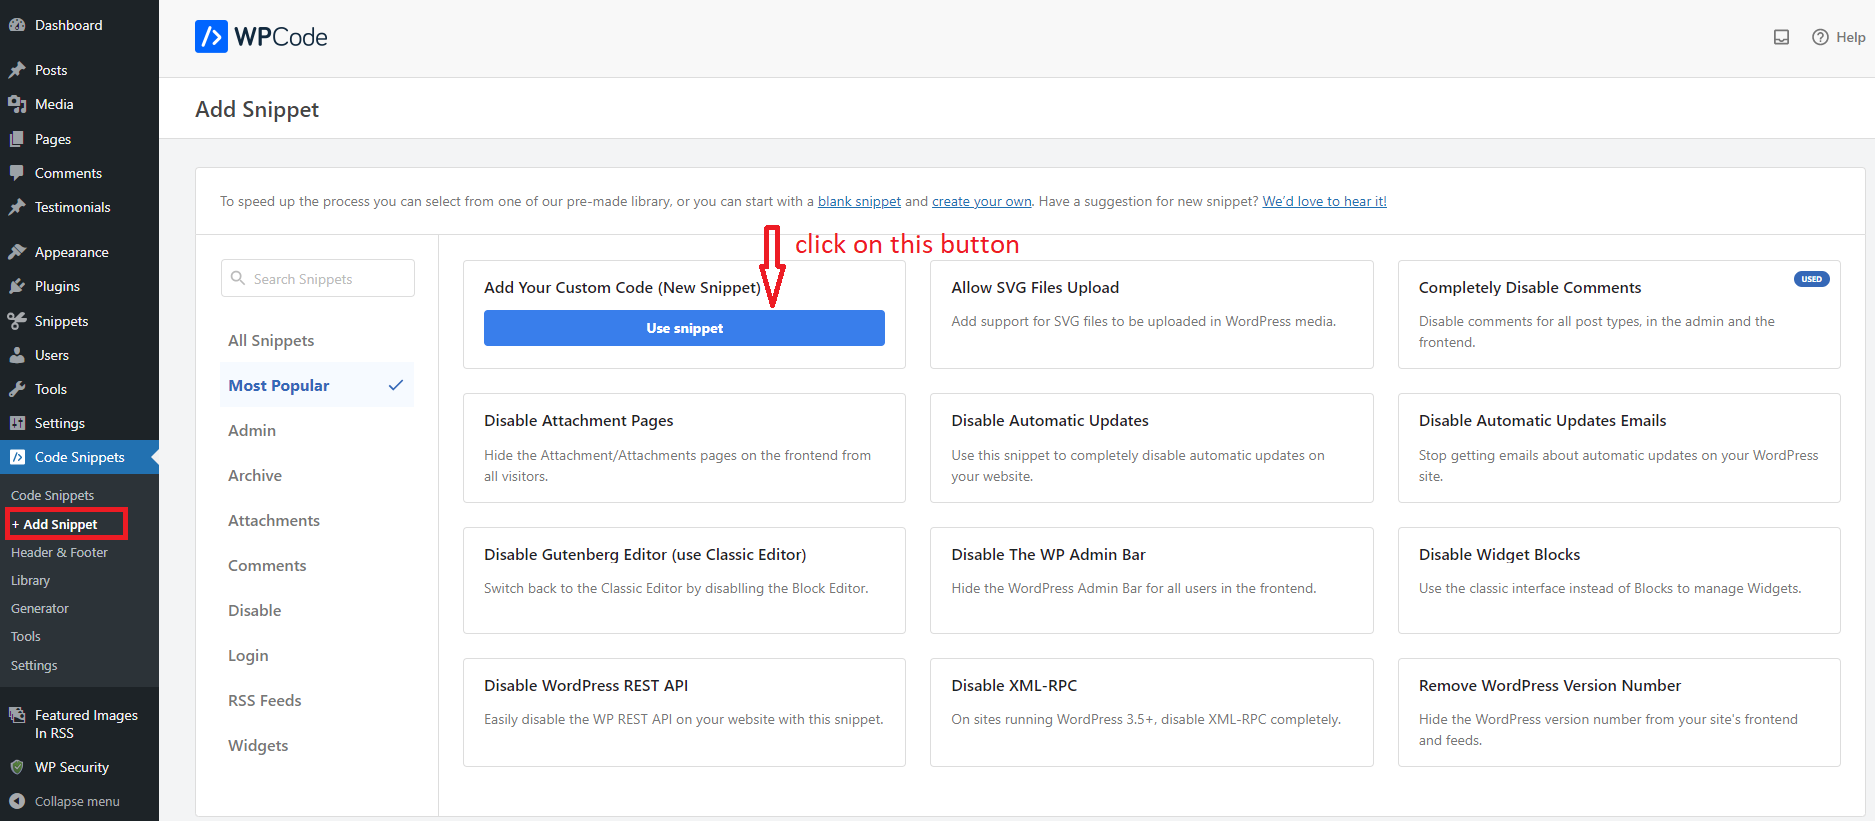
Upon activation, you can navigate to Code Snippets > +Add Snippet from your WordPress admin panel.
Then, hover over the “Add Your Custom Code (New Snippet)” option and click on the “Use snippet” button.
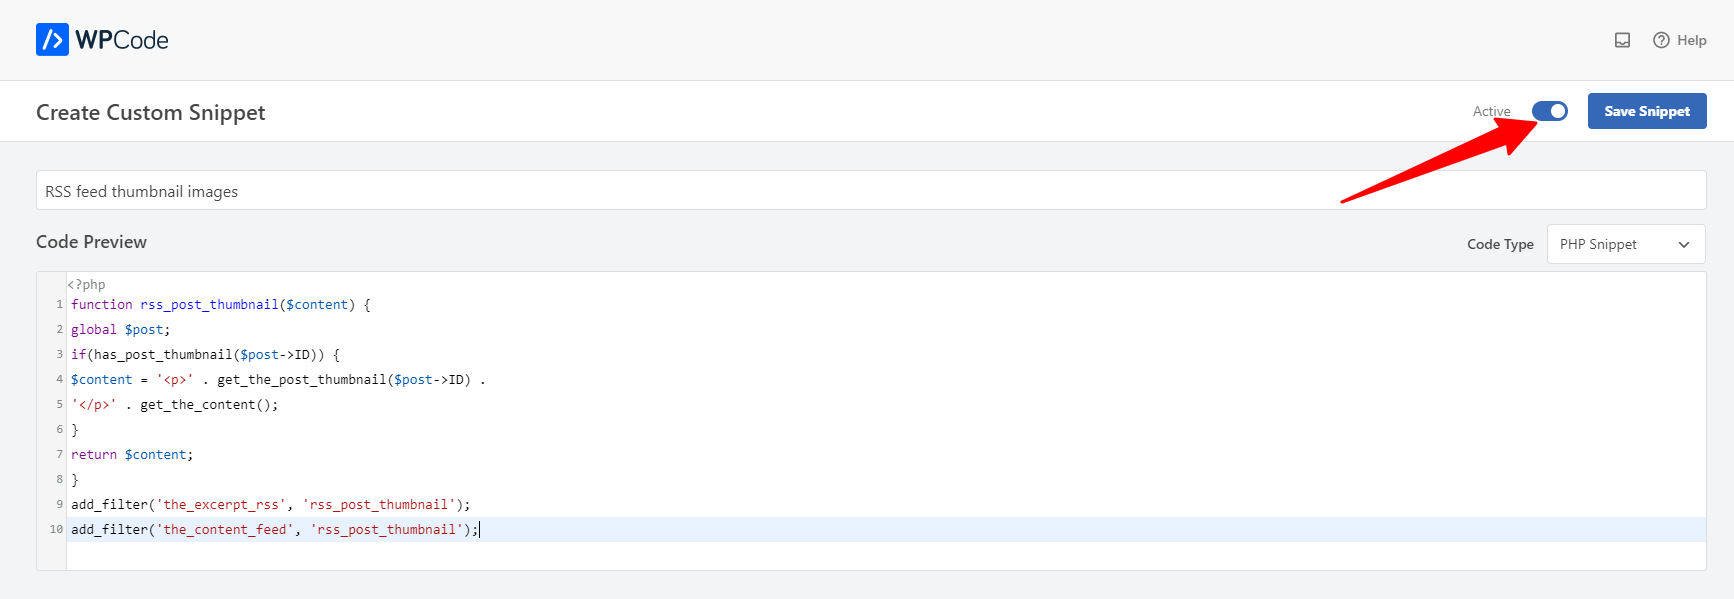
Next, you need to provide your code snippet a title and change the code type to PHP snippet by choosing from the drop-down menu. Then, copy the following code snippet and paste it into the “Code Preview” box.
|
1
2
3
4
5
6
7
8
9
10
|
function rss_post_thumbnail($content) {
global $post;
if(has_post_thumbnail($post->ID)) {
$content = ‘<p>’ . get_the_post_thumbnail($post->ID) .
‘</p>’ . get_the_content();
}
return $content;
}
add_filter(‘the_excerpt_rss’, ‘rss_post_thumbnail’);
add_filter(‘the_content_feed’, ‘rss_post_thumbnail’);
|
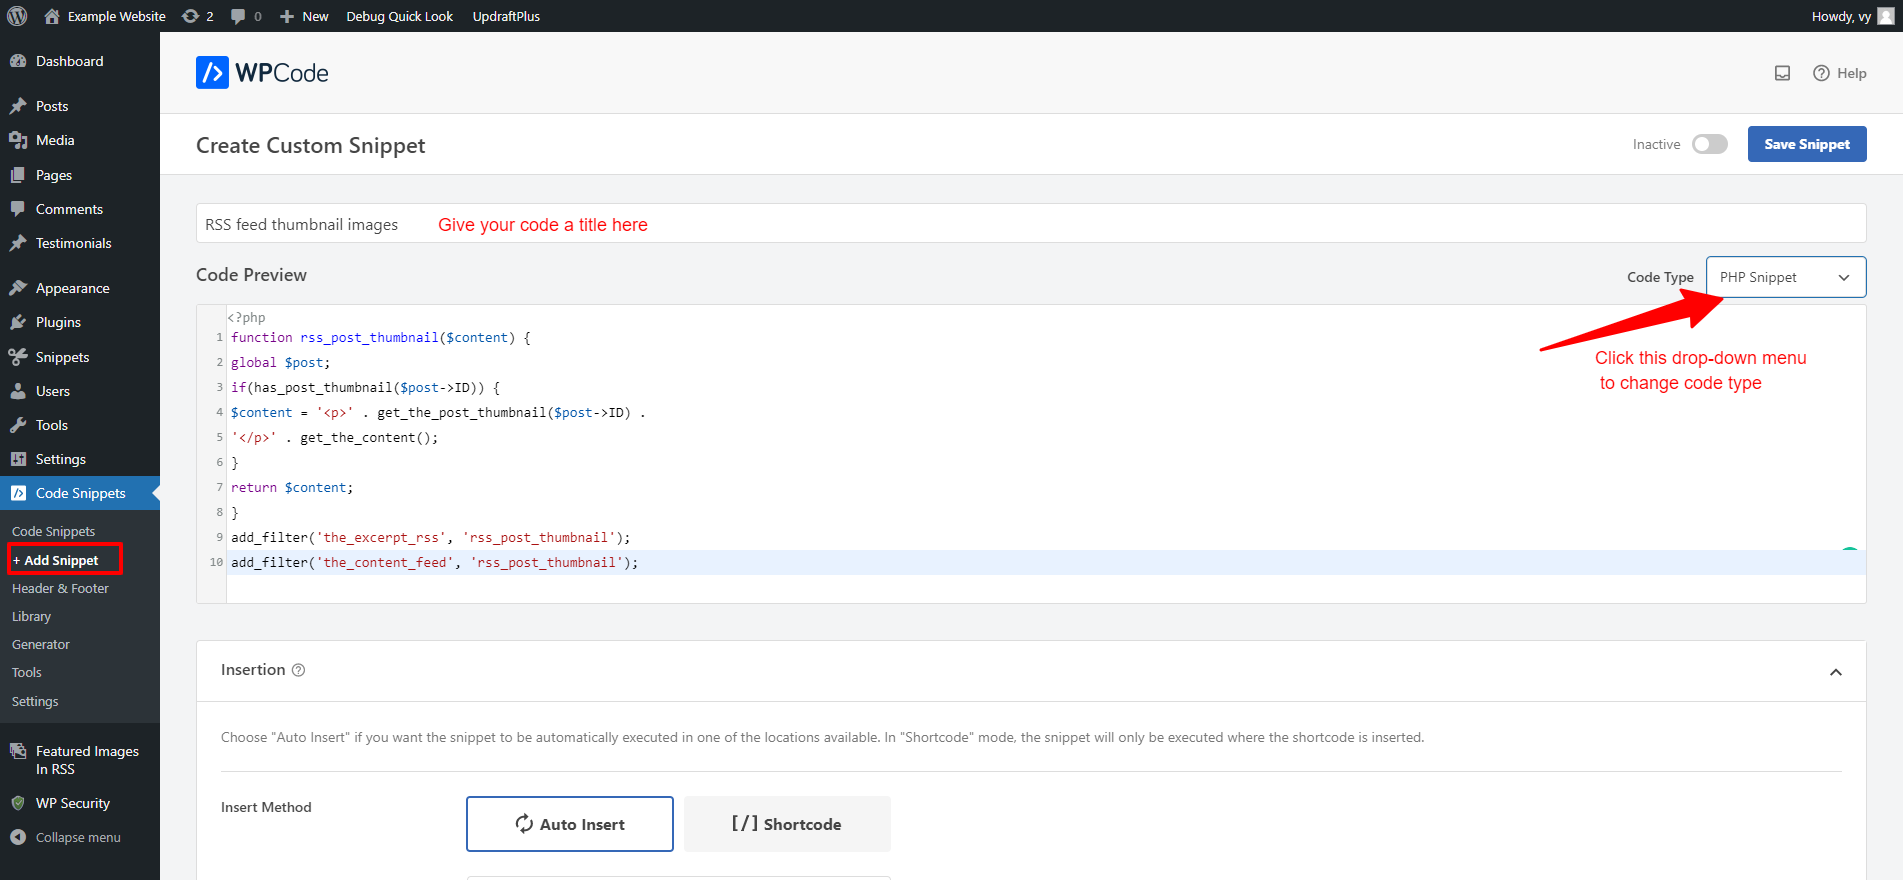
After that, let’s scroll down to the Insertion section.
From there, you can choose a method to insert your code snippet into your WordPress site. For this snippet, you should choose the “Auto Insert” option, then your code will be automatically executed on your website site.
Once you are done, let’s switch the toggle at the top right corner of the page from “Inactive” to “Active” and don’t forget to click on the “Save Snippet” button to save your code.
