There are two ways how to add buy now buttons to our WooCommerce store:
- With a PHP function.
- Using a plugin.
In this section, I will show you both ways, and let’s start with the first way, using a WordPress function.
Method #1: Use a function
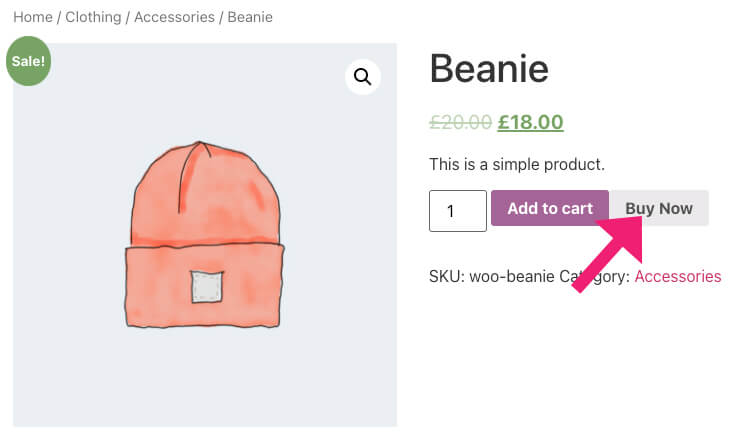
The PHP function will add a quick buy now button to the right of the add to cart button.
Once a customer clicks on the Buy now button, they’ll be automatically redirected to the checkout page to complete the purchase of the selected product.
You’ll need to paste the code below inside the functions.php file of your child theme.
First, navigate to Appearance -> Theme Editor and click on the functions.php file from the list on the right.
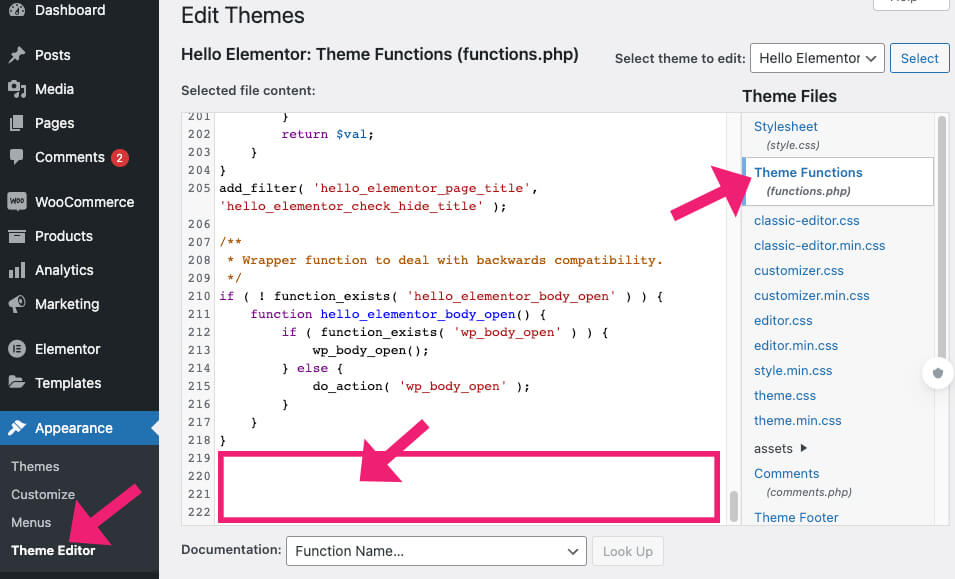
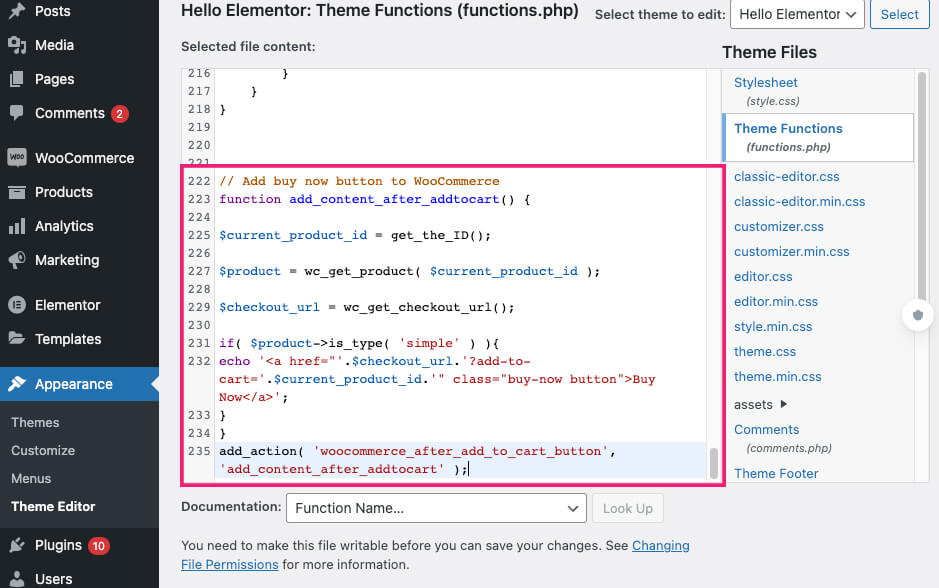
Then, scroll to the bottom of the file, paste the code below, and save the changes.
|
1
2
3
4
5
6
7
8
9
10
11
12
13
14
|
// Add buy now button to WooCommerce
function add_content_after_addtocart() {
$current_product_id = get_the_ID();
$product = wc_get_product( $current_product_id );
$checkout_url = wc_get_checkout_url();
if( $product->is_type( ‘simple’ ) ){
echo ‘<a href=”‘.$checkout_url.‘?add-to-cart=’.$current_product_id.‘” class=”buy-now button”>Buy Now</a>’;
}
}
add_action( ‘woocommerce_after_add_to_cart_button’, ‘add_content_after_addtocart’ );
|
Once saved, navigate to one of the products pages and click on the Buy Now button to verify that it’s working as expected.
Please note that the code above will only work for a simple product and not for variable ones.
Adding a buy now button to products with multiple variations requires a complex code that defeats the purpose of using a function.
If you only have simple products in your store, you’re in luck and can defiantly use the code above. You can now move on and learn how to redirect customers after checkout.
However, if you’re also offering products with multiple variables, you better use a plugin.
Method #2: Use a plugin
Using a plugin is preferred to add a buy now button because it’s the easiest and works with any product type.
In addition, the new button will inherit the used theme’s style sheet and will look great out of the box.
In this article, we will use the Quick Buy Now Button for the WooCommerce plugin by Addify.
You can download the plugin from the official website for a total price or from us for only $4.99 (same plugin).
Once downloaded, navigate to Plugins -> Add New -> Upload and upload the plugin.
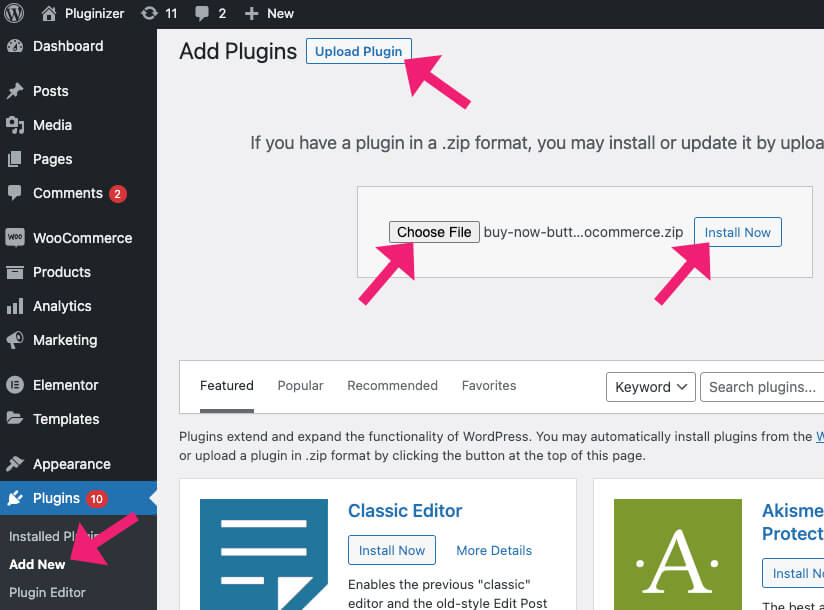
Once activated, the new Buy now button will be added to the products page next to the add to cart button.
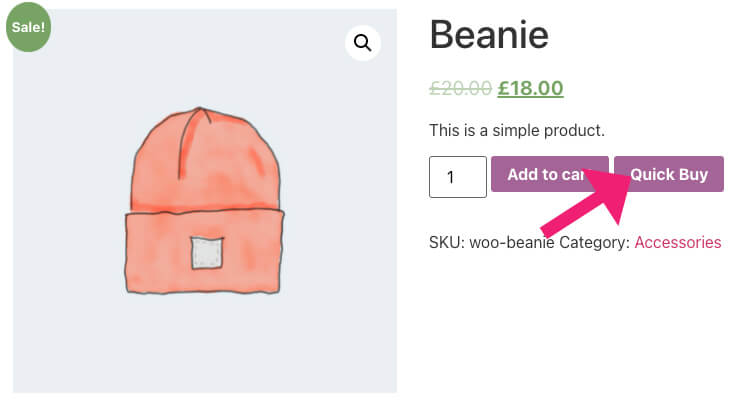
By default, the button’s text will be Quick Buy, and clicking on it will add the product and redirect you to the cart page.
If you’re ok with it, keep it as is. However, you can modify the button and change its text and behavior.
The button’s settings
To customize the button’s behavior, navigate to WooCommerce -> Quick Buy Button.
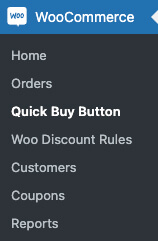
Under the general and the button’s settings tabs, you’ll have many options related to the button.
For example, check the replace box if you would like to remove the default add to cart button altogether.

To change the destination URL from the cart to the checkout page, expand the redirect location option and choose checkout.

In addition, you can also specify the categories where you would like to display the button.
To change the button’s text, navigate to the button settings tab and enter the Buy now text inside the label to change the quick buy text.
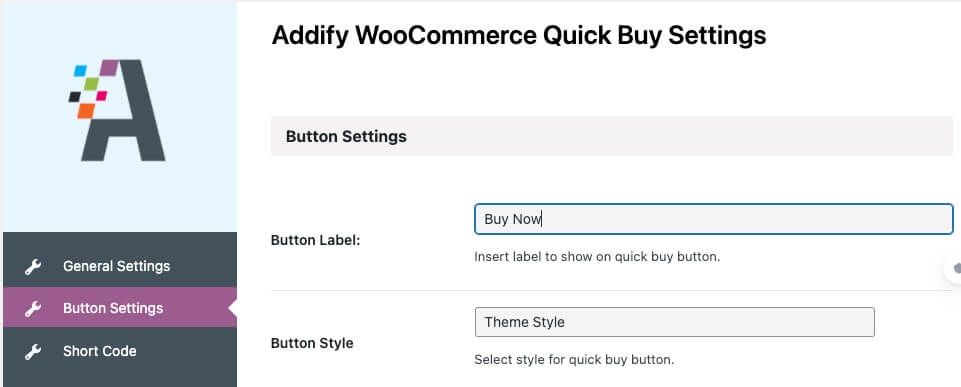
Additional options on this screen are hiding the shop page button or changing the buttons’ position.
Once you are done with the settings, save the changes and test the button.
